Components and Sparse Point Cloud
A component is a group of images that were able to align together due to sufficient image overlap and a number of common recognizable features. If images cannot align successfully, you may end up with multiple or without components. This can happen if your images contain disjoint scenes, are blurred, object texture is weak, there are not enough images, or change in perspective is too high.
A component was not created due to images not being able to align. The cause can be a lack of image overlap or insufficient common features. Please return to the previous step, add more images, and align.
All images have been successfully aligned! This means that RealityCapture was able to calculate the orientations and calibrations of cameras for every input image.
More than one component was calculated from the given set of images. You can add more images and align again, use control points to create artificial tie points between images or proceed to the next step if the number of aligned images in one of the components is sufficient for your needs.
You created a component but not all inputs were used. Add more images and align again or continue to the next step. You can see how many inputs are aligned in the component in the 1Ds view.
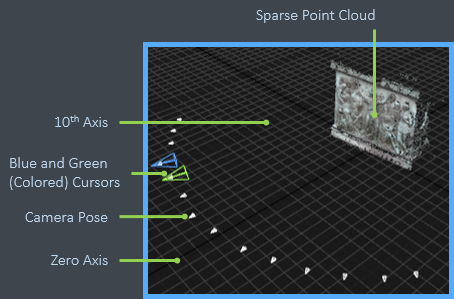
Each component contains camera poses and a sparse point cloud. You can easily display your component and navigate through it.
- Switch one of your views to 3Ds (Scene 3D View) using the view aspect button in the upper right corner of a view. Change the application layout if necessary.
- You can display different components using the Component dropdown menu in the Source part of the SCENE 3D / VIEW tab.
An aligned scene should look like this in the 3Ds view:
You can move around the sparse point cloud and check the color poses. To navigate around the point cloud:
- Click and hold the left + right mouse button and move the mouse to pan the view.
- Use the mouse wheel to move forward and backwards.
- Click and hold the left mouse button and move the mouse to move the view along the scene grid.
- Click and hold the right mouse button and move the mouse to rotate the view around the scene pivot or the scene origin.
- Double-click the left mouse button to set the scene pivot to the cursor position.
Don't forget to save your project after each step.
You can do it in the dropdown menu that shows up after clicking on the logo button in the upper left corner, or you can use the Ctrl+S shortcut.
