Ground Controls Import
Ground controls are one of the three types of control points. They are linked to a 3D position, e.g. GPS coordinates. If you have coordinates of control points, you can import their values and place them in the respective photographs in order to geo-reference and/or scale the model.
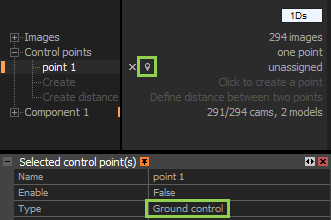
- The icon representing a ground control point looks like this:

- First, make sure you have set the project coordinate system to the one which the to-be-imported ground controls are in. The application Settings can be found in the Application part of the WORKFLOW tab under Coordinate systems / Project coordinate system.
- Now go to WORKFLOW / Ground Control and browse a file with ground control points.
Import Dialog
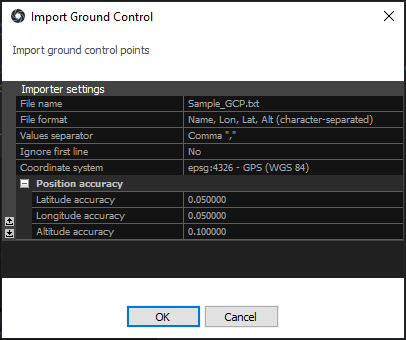
The import dialog will appear immediately. Let us have a look at the options in the import dialog window:

- File name The name of the file containing the information about the ground control points.
- File format Define order and type of the values defining the ground control points.
- Values separator Separator used to separate the values found in the ground control points’ file. Qualifiers are also supported, which means you can place each field in double quotes ("") to signify that it is the same field.
- Ignore first line If the file contains a header, RealityCapture can ignore the first line of the file. Lines that begin with symbol # are automatically skipped.
- Coordinate system Define the coordinate system in which the ground control points are located.
- Position accuracy The accuracy of the coordinates of the ground control points. Accuracies can also be loaded from a file by choosing a proper File format.
-
You can define your own file format, different values separator, comment symbol or qualifiers in the groundcontrol.xml which can be found in the application installation folder.
You can find the instructions on how to edit the groundcontrol.xml, as well as the list of supported values for import here.
HINT: Lon - longitude, Lat - latitude, Alt - altitude
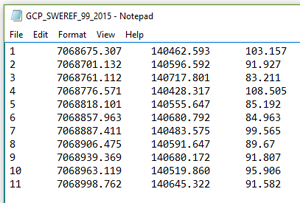
A sample of the Name, Y (North), X (East), Alt (character-separated) file format with tab-separated values:

- The system supports inputs in degrees or X, Y and Alt in absolute values, all depending on the chosen coordinate system.
- After clicking OK in the dialog shown at the top of this page, your GCPs values will be imported into your project.
- At this stage, it is advisable to check the imported coordinates of at least 2 GCPs according to the coordinates given in the source file. If something is incorrect, amend and continue to the next step.
- Now, all you have to do is to place the GCPs manually in the right position. The simplest way is to drag and drop the GCPs from the 1Ds view list.
Final Tips
- We recommend you to use one GCP in at least three images.
- The shortcut for adding a control point manually is F3.
- Discrepancies of coordinates up to 5 cm are tolerable.
- You can import GCPs using the command line as well.


