Add Images
Let's begin by adding inputs to the project. You are free to use your images or laser scans, or the option below to upload our dataset directly.
Some images have already been added to the project. You can proceed to the next step, add more images, or begin a new scene with different images. To start a new scene, click the main application icon in the top-left corner to open the menu and select or press CTRL+N.
There are multiple ways you can add inputs to your project.
- Use the button in the 1. Add imagery section of the Workflow tab to add one or more images from the same folder. Alternatively, you can use the ctrl+enter shortcut.
- To add all images from a folder, use the button or use the ctrl+shift+enter shortcut.
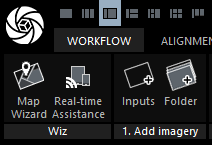
-
Images and inputs can also be Drag and dropped into RealityCapture. A plus symbol
 will appear when the dragged selection can be accepted.

To proceed, add one or more images to the project using the methods described above, or import a small sample dataset directly using the option below.

You can find and download other sample datasets we offer here.
Continue
Calculate camera poses for added inputs
Continue
Images and where to find them
See also:
- Import laser scans - found how are the laser scans imported
- Video as an input - learn how to use a video as an input
- Import aerial data - how to use aerial data and what to do with them