Creating and Placing Control Points
RealityCapture supports more ways of creating control points: in the 2D or the 3Ds view using the Control Points tool, from the 1Ds view, drag and dropping control points to the 2D view from the 1Ds view or importing control points.
To add one or more control points in the 2D image view:
- To activate the tool click on the Add Control Points button in the ALIGNMENT tab or on the Suggest Control Point button in the ORTHO 2D/TOOLS tab. This tool can also be activated by pressing the F3 key on a keyboard.
- To assign a control point, just click into an image and hold the left mouse key pressed. It will automatically create a control point and zoom in, so that you can fine-tune its placement. Use the mouse wheel simultaneously with the pressed left mouse button to change the image zoom during the fine placement. Release the left mouse button to place and confirm the control point or use the right click to cancel placing. The control point editor automatically creates a point and selects it. If you click in another image, it will create a corresponding tie point in the other image and link these points together.
- The application will zoom in all views which are showing the same point. Therefore you can look in other views, to fine-place the point better.
- At any time, you can click and hold the left mouse button to alter a control point position. The application will enter the fine-placing mode and zoom in the view.
- The application always links a newly-created point with the currently selected point.
To start creating a new control point, rather than a linked control point (e.g. a different corner of the building),
you have more options:
- place the new control point in the same image
- deselect the currently selected control point using the right mouse button
- select a different control point by clicking on it - either in the application views or the 1Ds view
To add control points in the 3Ds view:
- Activate the control points tool by clicking on the Control Points button in the SCENE 3D/TOOLS. This tool can also be activated by pressing the F3 key on a keyboard.
- While moving with the mouse around the point cloud or mesh in the 3Ds view gray lines will be shown. These lines are connected to cameras from which the current position of the mouse can be seen. All the cameras to which those lines are connected are going to be displayed in the 1Ds view under the created point as suggested measurements. To create a point just click on the point cloud or mesh.
- With every click, a new control point is created. To change the position of a control point it has to be fine tuned on the images to which it is assigned.
Delete Control Points
- To delete a newly created control point, just press CTRL+Z. It will undo the last change.
- To delete any control point, go to the 1Ds view, expand the Control points list, hover over the control point and click close.
Drag and Drop Control Points
You can drag and drop control points between views, and also between control points in 1Ds.
- You can drag and drop a control point from the 1Ds view list.
- Hold the ctrl key and drag a CP in the 2D image view and drop it onto another image. This will create a new point and link it with the source point automatically. Then you can click and hold the left mouse on the point to fine-place it.
- If you accidentally created a new point which was supposed to be linked to some other points, or mixed points, you can fix it easily. Open the affected control point trees in the 1Ds view and simply drag the misplaced image name and drop it to the correct control point tree.
Suggestion of Control Points Measurements
Measurements can be suggested for every control point with 3D coordinates (Ground Control
or Tie Point with at least 2 assigned images).
Use the Suggest Measurements button, which is accessible from the Constraints part of the SCENE 1D/TOOLS tab or from the Alignment Constraints part of the IMAGE 2D/TOOLS tab.
To remove such suggestions, simply click Clear Suggestions, or click the X button in the respective line in the list of your control points in the 1Ds panel.
Please note that the removed suggestions will be banned, which means that the cleared measurement suggestions will not be shown again even after next control point manipulation.
In order to take the banned measurements back into consideration hit the Unban Suggestions
or click the Suggest Measurements button to create suggestions again.
Georeferencing Using Map View
If you do not have any ground control points, it is possible to create them in the map view.
Place control points into images as Tie points in places that are easy to locate on a map. Open map view and while your
Control points tool is active and control point, that you want to place on a map is selected, click on the map where you want
to place your control point. It will automatically change to Ground control point. Be noted, that the height of points will
always be set to the same value (default value is 1). If you want to change the placement of a ground control point on a map,
just change its type to Tie point and use Control points tool to place it again.
This is useful in various cases. For example, if you do not have prior coordinates and you want to use your orthophoto in a
cartographic software. This will help locate your orthophoto faster in the software. Another example is if you want to combine more georeferenced
components into one, but you do not have any prior geo-location information. Just be aware that the accuracy of this method of georeferencing can vary in meters,
since it is based on the accuracy of a map that was used.
Update Ground Control Points
Once you are finished with creating and placing control points, click on the Align Images (F6). You can alternatively use the Update button to apply changes made in ground control points or distance constraint. In contrast to the full alignment, which will take into account all control points and relations, the Update function will just use ground control points and distance constraints to place and scale the scene. However, it does not change relative positions of cameras in the scene and thus it can scale and position also all already created models. The alignment is always more precise, but since the camera poses might change too, all previously created models will not match with the cameras. Therefore a new component is created and models are left in the previous (parent) component.
Rename Control Points
To change the name of a control point, just click the chosen control point in the 1Ds view, highlight its name (using your mouse) in the Selected control point(s) panel that shows up below, in the same window. Type in the desired new name and click the Enter key.
You can even rename further control points' names simultaneously (please note that a logic number will be added behind the typed name automatically in order to differentiate the name from the names in the list):
- Here is how to conveniently select further control points in a row (in the 1Ds window): click the name of the 1st control point for your selection, hold Shift and simultaneously click the last control point for your selection, now highlight the "Name" value in the Selected control point(s) panel underneath, and retype the name.
- If you want to select more control points that do not follow chronologically (in the 1Ds list), click the 1st control point of your desired selection and, when selecting any others, simply hold Ctrl. When you are finished with the selection, again, highlight the name in the Selected control point(s) panel, and retype it.
Sort Control Points
The list of control points in the 1Ds view can be sorted in the SCENE 1D / VIEW tab. They can be sorted by their index that corresponds with the order in which they were created, or by their names.

Relation to Cameras
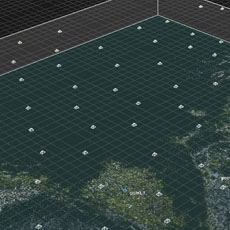
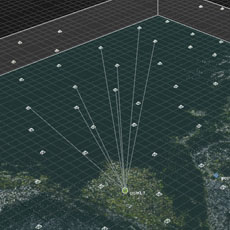
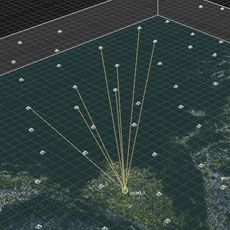
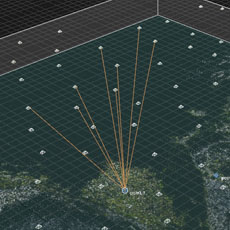
When you hover your mouse cursor over a control point or click a control point in the 1Ds, 2D, or 3Ds view, lines connecting the control point with the corresponding camera(s) will appear in the 3Ds view. This helps you identify in which images are placed those control points in the 3Ds view.
Control Points
Learn more about control points
Control Points' Measurements Import
How to import control points' positions into your project
Ground Control Points Import
How to add ground control points into your project
See also:
- Learn how to scale a scene click here.
- Learn how to geo-reference a scene click here.
- Read more about coordinate systems click here.


